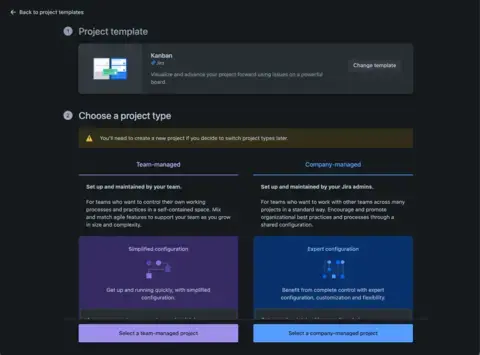
This article is the second part of our series on using Jira. Previously, we talked about choosing between Scrum and Kanban. Before diving in further, we need to cover another choice you’ll make when creating a project. Will it be company-managed or team-managed?
Company Managed Projects
Company-managed projects are like orchestras—structured, harmonious, and with a clear conductor guiding the melody. They're ideal for projects requiring strict governance and standardized workflows. Here are the highlights:
- Structure and Standardization: These projects follow a standardized approach with predefined processes, which ensures consistency and control across the organization.
- Centralized Control: A central authority or project manager oversees the project and ensures alignment with organizational goals.
- Ideal For: Larger projects that require coordination across multiple departments or teams, where standardized reporting and processes are beneficial.
Team Managed Projects
Team-managed projects, on the other hand, are like jazz bands—improvisational, flexible, and adaptable. They fit snugly with teams that crave autonomy and have unique workflow needs. These projects are easier to manage regarding access control with more straightforward configuration but lack some things, including a centrally managed workflow, issue types, and permissions setups.
- Flexibility and Autonomy: Teams have more freedom to define their workflows and processes, allowing quicker adaptation to changes.
- Decentralized Control: Teams operate with more independence, making decisions and adjustments as needed.
- Ideal For: Smaller, agile projects where innovation and rapid iteration are crucial, and teams benefit from working autonomously.
What kind of project is best for you?
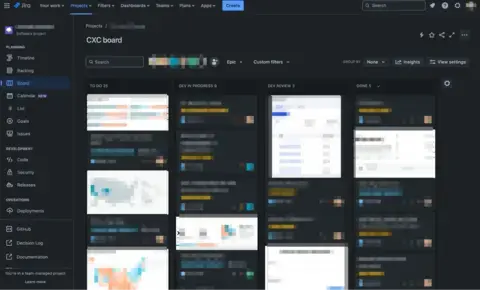
One thing that probably stands out the most between team and company projects is that team projects can only have one board, and it's less customizable. Having the freedom to make additional boards and configure the filter on each board a little differently is helpful when managing a large team, as is adjusting the swim-lane configuration so you can see work by epic or by team member.
In Jira, a board is the main hub around which your team swarms. They see what they’re working on, what’s coming up, and the state of any issue. It’s where everyone goes to understand the work that needs to be done.
However, smaller, more tightly focused tools can be useful for different kinds of projects. Not everything needs to be customized, so team-managed projects are still useful.
So, team-managed Kanban or Scrum makes the most sense for lighter-weight project needs unless there’s a compelling need for multiple boards and more customization options. Access control is a snap, and the workflows are still customizable.
Company-managed projects are more appropriate for medium to large projects because they often benefit from multiple boards or need to mix multiple projects in various ways.
Composing Your Jira Symphony
Setting up a project in Jira is an orchestra in itself. It's about understanding what makes your team tick and what keeps them in sync. Let’s focus on the essential elements: focus on essential elements like:
- Project Roles: These define the responsibilities and capabilities of team members within a Jira project. Roles like Project Manager, Developer, or Tester can be assigned specific permissions. Correctly defined roles ensure that team members have access to the right features and information to perform their roles effectively.
- Permissions: Permissions in Jira govern what users can and cannot do within a project. They are crucial for maintaining the integrity and security of the project data. Permissions can be set at various levels, including project-wide, issue-specific, or for certain features like reporting.
- Issue Types: Issue types in Jira categorize the different kinds of work or tasks within a project. Common types include Bug, Task, Story, and Epic. Each issue type can be configured with unique workflows, fields, and screens, reflecting the work's specific nature and requirements.
Harmonizing Workflows in Jira
A well-defined workflow in Jira ensures that tasks flow smoothly without unnecessary bottlenecks. It's about creating a rhythm your team can dance to, ensuring each step in the task's journey is clear and logical.
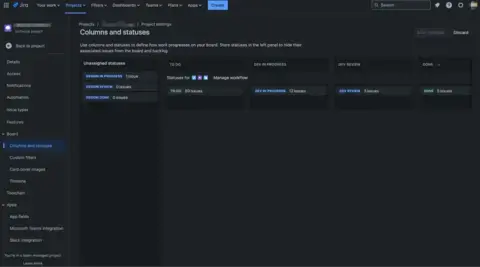
Issue statuses generally match up to the columns we create on a board. When deciding on which statuses make sense for your project, it’s important to consider these criteria:
- What event occurs to move the ticket into a new state?
- Who is responsible for moving the ticket?
- Who is the ticket assigned to after being moved?
Make these decisions together as a team before starting the project. Document them. Post the results in the project’s process docs. To keep a ticket moving along the workflow, team members should know when it’s their responsibility to address it. Addressing it might be as simple as leaving a comment and assigning it to someone else. Or as involved as starting development on the ticket.
Practical How-To: Setting Up Your Project in Jira
For Company-managed Projects
1. Create a Company Managed Project
- Log in to your Jira account.
- Click on the “Projects” dropdown in the top navigation bar.
- Select “Create project”.
- Select a project template that suits your needs (e.g., Scrum, Kanban).
- Fill in the project details, such as the project name and key.
- Click “Create”.
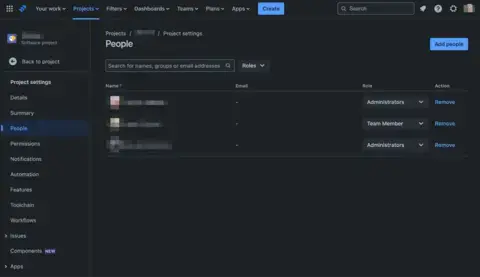
2. Define Roles and Responsibilities
- Navigate to your project.
- Go to “Project settings” in the left-hand sidebar.
- Click on “People”.
- Add team members and assign roles (e.g., Administrator, Team Member, Read-Only).
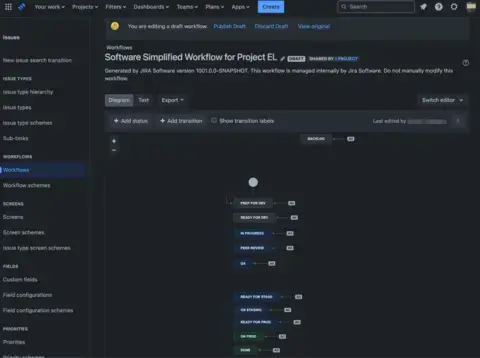
3. Establish Standard Workflows
- In “Project settings,” click on “Workflows”.
- Edit the existing workflow or create a new one.
- Define the statuses and transitions according to your process.
It is advisable to copy and customize an existing workflow for your project.
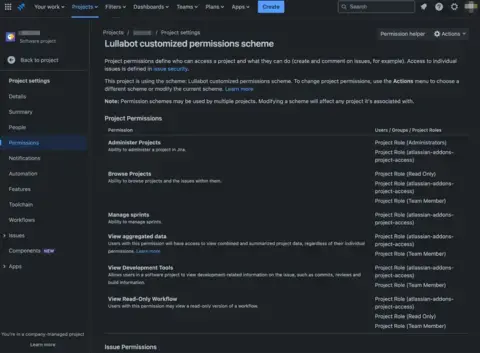
4. Configure Permissions
- Go to “Project settings” > “Permissions”.
- Edit the permission scheme.
- Assign permissions based on roles.
This screen can be a bit overwhelming. We suggest you only edit these if really necessary. In many cases, the defaults are sufficient; you only need to touch these if you create new roles.
For Team-managed Projects
1. Create a Team Managed Project
- Log in to your Jira account.
- Click on the “Projects” dropdown in the top navigation bar.
- Select “Create project”.
- Select a project template that suits your needs (e.g., Scrum, Kanban).
- Choose “Team-managed project”.
- Fill in the project details, such as the project name and key.
- Click “Create”.
2. Promote Collaboration
- In your project, click on “Board” in the left-hand sidebar.
- Use the board to create, assign, and move tasks.
- Utilize comments and @mentions to facilitate communication.
3. Customize to your needs
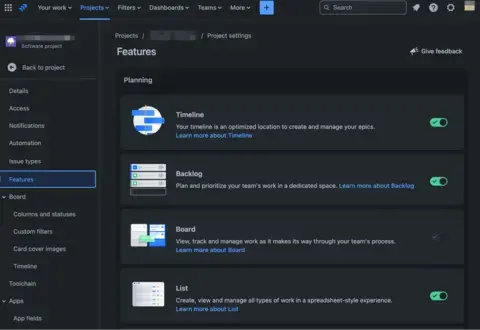
- In “Project settings,” click on “Features.”
- Enable or disable features like Backlog, Sprints, and Reports based on team needs.
4. Keep Processes Simple
- In “Project settings,” click on “Workflows.”
- Use a simple workflow with minimal statuses (e.g., To Do, In Progress, Done).
Tip: You can add Columns to your board more easily and create new workflow statuses by Configuring the Board.
5. Regular Monitoring and Adjustments
- Conduct regular stand-up meetings to discuss progress.
- Use the “Reports” section to review progress and adjust plans.
Bringing Your Jira Project to Life
As you bring your project to life in Jira, remember that it's not just about the tools but how you use them. It's about striking that perfect balance - between structure and flexibility, guidance and autonomy. Company-managed projects give you more structure and control. Team-managed projects give your different teams more flexibility. Every project is different. Choose wisely because to change this setting, you'll need to create a new project.
When in doubt, it might be best to choose a company-managed project since that will give you multiple boards and allow you to run one or more teams in the same project. Be aware, however, that this will limit you in other ways.

